Thursday, September 22, 2011

save the ta-tas.

My office celebrated PINK day a couple weeks ago- a huge effort to raise money for the Susan G. Komen Breast Cancer 3-Day event.  Part of the fundraising involved a bake sale, and so naturally, I offered up my services.  I originally wanted to do some sort of pink macaron. They'd be light and fluffy (I think... seeing as though I've never made or eaten a macaron before) and awesome.  But then I looked at how complicated the recipes were and decided to go with chocolate and strawberry whoopie pies.  I'll attempt macarons one day, but not today.

The Cakes.

The cakes were by far the easiest part of the recipe.  Some butter, brown sugar, flour, cocoa powder & some other basics are all it took to create this lovely little batter.  It's almost pudding-like in consistency. 


I dropped tablespoon-fuls of batter onto a lined cookie sheet and then baked for about 10 minutes.


The Filling.

The majority of my baking struggles deal with frostings.  I have a love hate relationship with them.  Completely unpredictable.  So, my first idea was to take a marshmallow creme frosting and add strawberry puree to get a lovely PINK color and some strawberry flavor.  Great idea, right?  No. Not at all.  It was a very very bad mistake.  It started off okay, but was completely shot once I added the strawberry puree.  It was far too thin to be spread on anything.  So, I came up with another great idea!  Cornstarch!  After a bit of Googling, I discovered that you could boil 2 tablespoons of cornstarch in a cup of milk, and use that to thicken your frosting.  Just FYI, if your frosting is almost liquid to begin with, no amount of cornstarch can save you.

The cornstarch concoction.
 

And this is the unfortunate result.  No filling or frosting should EVER look like this.  It tasted okay, but I couldn't get past the texture.  Ugh.


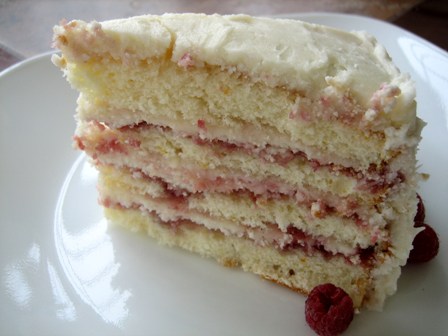
So, I switched gears, and found a strawberry buttercream recipe I could be proud of.  Super simple, and extremely tasty.  And here's the finished product.  Happily tucked away in a tupperware dish for safe transportation to the office.


Classic Chocolate Whoopie Pie
from Whoopie Pies
1 2/3 cups all-purpose flour
2/3 cup unsweetened cocoa powder
1 1/2 teaspoons baking soda
1/2 teaspoon salt
4 tablespoons unsalted butter, room temperature
4 tablespoons vegetable shortening
1 cup packed dark brown sugar
1 egg
1 teaspoon vanilla
1 cup milk
  • Preheat oven to 375 degrees.
  • Line baking sheets with parchment paper.
  • In a bowl, sift together, flour, cocoa, baking soda, and salt.
  • In another bowl, beat butter, shortening and sugar with a mixer on low until just combined. Increase speed to medium and beat for about 3 minutes.
  • Add egg and vanilla and beat for two more minutes.
  • Add half of the flour mixture and half of the milk and beat on low until incorporated. Repeat with remaining flour and milk and beat until combined.
  • Using a tablespoon, drop batter on baking sheet two inches apart. Bake for about 10 minutes each or until pies spring back when pressed gently.
  • Remove from oven and cool for about five minutes before transferring them to a rack to cool completely.
 The batter made about 60 cakes for me (30 finished whoopie pies).

Strawberry Buttercream
2 sticks (16 tbsp) of butter, room temperature
1 cup strawberries, pureed (I measured out the strawberries first and then pureed them)
3-4 cups powdered sugar


1) Cream butter in a mixer on medium-high speed for about 3 minutes.
2) On low speed, gradually add 2 cups of powdered sugar and turn back up to high for a few minutes to really incorporate the sugar. 
3) Turn to low speed again and fold in the strawberries.
4) Add more sugar until the desired consistency is achieved. Mix well.

I used about 1/2 cup of pureed strawberries and right around 2 cups of powdered sugar.  More berries, more sugar.  It's a pretty easy recipe to manipulate.

Tuesday, September 13, 2011

root beer float cake & a quarter century

Happy happy birthday to my big sister, Riley.  She has crossed over from the "18-24" age bracket to the oh-so-distinguished "25-34" year old category.  I think 25 will be a good year for her.


And since it was a birthday, it had to be celebrated with cake.  Root beer float cake to be exact.  Once again, a delicious brown eyed baker recipe (there's a theme going on here....).  And I'm super proud because it was NOTHING like the death cake!! I'm having more and more birthday success ;)


The cake is super moist and has just a hint of root beer flavor, nothing overwhelming.  The recipe says that the root beer flavor gets stronger if the baked cake sits overnight.  Mine sat for a day before we ate it, and my sister still couldn't taste the root beer.  But even if the root beer hides itself, it's still an amazing chocolate cake.  Fudge frosting is awesome too.


Recipe is below!

Root Beer Float Cake 

Yield: One 10-inch bundt cake
Prep Time: 30 minutes | Bake Time: 35 to 40 minutes 

For the Root Beer Bundt Cake:
2 cups root beer (do not use diet root beer)
1 cup dark unsweetened cocoa powder
½ cup (4 ounces) unsalted butter, cut into 1-inch pieces
1¼ cups granulated sugar
½ cup dark brown sugar
2 cups all-purpose flour
1¼ teaspoons baking soda
1 teaspoon salt
2 eggs

For the Root Beer Fudge Frosting:
2 ounces dark chocolate, melted and cooled slightly
½ cup (4 ounces) unsalted butter, softened
1 teaspoon salt
¼ cup root beer
2/3 cup dark unsweetened cocoa powder
2½ cups powdered sugar

 1. Preheat oven to 325 degrees F*. Generously spray the inside of a 10-inch bundt pan with nonstick cooking spray, or butter the pan and dust with flour, shaking out the excess flour; set aside.

2. In a medium saucepan, heat the root beer, cocoa powder and butter over medium heat until the butter is melted. Add the sugars and whisk until dissolved. Remove from the heat and let cool.

3. In a medium bowl, whisk the flour, baking soda and salt together

4. In a small bowl, whisk the eggs until just beaten, then whisk them into the cooled cocoa mixture until combined. Gently fold the flour mixture into the cocoa mixture. The batter will be slightly lumpy, which is okay. Do not overbeat it, as it could cause the cake to be tough.

5. Pour the batter into the prepared pan and bake for 35 to 40 minutes, rotating the pan halfway through the baking time, until a small sharp knife inserted into the cake comes out clean. Transfer the pan to a wire rack to cool completely. Gently loosen the sides of the cake from the pan and turn it out onto the rack.

6. To make the Root Beer Fudge Frosting, put all of the ingredients in a food processor. Pulse in short bursts until the frosting is shiny and satiny, scraping the sides of the food processor a couple of times. (If you don’t have a food processor, simply throw it all into the bowl of a stand mixer or a large bowl using a hand mixer and mix on medium-low until combined and satiny smooth.

7. Use a spatula to spread the fudge frosting over the cake in a thick layer. Let the frosting set before serving. Store leftovers wrapped well or in an airtight container at room temperature.
 *Note: If you are using a dark, nonstick pan, heat the oven to 300 degrees F.

(Recipe adapted from Baked: New Frontiers in Baking)

Thursday, September 8, 2011

update: vanilla cupcakes with strawberry buttercream

I've made these cupcakes twice since the last time and i'm still in love =)  The first was for a friend's graduation/going-away party and then for my co-worker's baby shower.  The cake is tender and moist, and the buttercream is just sweet enough.  The strawberry flavor is amazing.  Here are some pics from my new camera!


Introducing Blue.  She's a Nikon D5100.  I love her.  And she takes great photos of great things. Like butter and eggs.


Friday, August 12, 2011

tiramisu birthday cupcakes

My last attempt at baking something for a friend's 23rd birthday was a beautiful failure (see "death cake"), but this time was a success!! These cupcakes are another Brown Eyed Baker recipe and once I read the recipe, I knew my friend would absolutely love it.  She's not-so-lowkey addicted to coffee so I figured a coffee/marsala infused cupcake would be right up her alley.  And she loves all things mascarpone, which meant that this cupcake was bound to succeed =)

Now, I must say, this was quite an involved recipe.  I had to buy actual vanilla beans, and mascarpone cheese, and go to three different stores to find marsala wine! And to top it all off, I went to a cute little coffee shop to buy a shot of espresso around 7pm and got a strange look from my barista (is it barist-o if it's a man?) Who does that?? Well, I guess I do now...  But it was all worth it.  After the cupcakes baked, they were soaked in the coffee/marsala syrup and then frosted with the mascarpone whipped cream frosting.  I made mine the night before and refrigerated them.  The cupcakes stayed moist and the frosting didn't fall apart or get hard.  The birthday girl liked them so much she ate 3.  In one night.  =)

Recipe is below.  Enjoy!

For the Cupcakes:
1¼ cups cake flour (not self-rising), sifted
¾ teaspoon baking powder
½ teaspoon coarse salt
¼ cup milk
1 vanilla bean, halved lengthwise, seeds scraped and reserved
4 tablespoons unsalted butter, at room temperature, cut into pieces
3 whole eggs plus 3 egg yolks, at room temperature
1 cup granulated sugar

For the Coffee-Marsala Syrup:
1/3 cup plus 1 tablespoon freshly brewed very strong coffee (or espresso)
1 ounce marsala
¼ cup granulated sugar

For the Mascarpone Frosting:
1 cup heavy cream
8 ounces mascarpone cheese, room temperature
½ cup confectioners’ sugar, sifted
Unsweetened cocoa powder, for dusting

1. Preheat oven to 325 degrees F. Line standard muffin tins with paper liners. Sift together cake flour, baking powder, and salt. Heat milk and vanilla-bean pod and seeds in a small saucepan over medium heat just until bubbles appear around the edge. Remove from heat. Whisk in butter until melted, and let stand 15 minutes. Strain milk mixture through a fine sieve [I used cheesecloth] into a bowl, and discard vanilla-bean pod.

2. With an electric mixer on medium speed, whisk together whole eggs, yolks, and sugar. Set mixing bowl over a pan of simmering water, and whisk by hand until sugar is dissolved and mixture is warm, about 6 minutes. Remove bowl from heat. With an electric mixer on high speed, whisk until mixture is fluffy, pale yellow, and thick enough to hold a ribbon on the surface for several seconds when whisk is lifted.

3. Gently but thoroughly fold flour mixture into the egg mixture in three batches; stir ½ cup batter into the strained milk mixture to thicken, then fold milk mixture into the remaining batter until just combined.

4. Divide batter evenly among lined cups, filling each three-quarters full. Bake, rotating tins halfway through, until centers are completely set and edges are light golden brown, about 20 minutes. Transfer tins to wire racks to cool completely before removing cupcakes.

5. Make the syrup: Stir together coffee, marsala, and sugar until sugar is dissolved. Let cool.

6. Brush tops of cupcakes evenly with coffee-marsala syrup; repeat until all syrup has been used. Allow cupcakes to absorb liquid 30 minutes. [It's going to seem like there is far too much syrup for the cupcakes, but use it all! They won't end up soggy, just amazing]

7. Make frosting: With an electric mixer on medium speed, whisk heavy cream until stiff peaks form (be careful not to overbeat, or cream will be grainy). In another bowl, whisk together mascarpone and confectioners’ sugar until smooth. Gently fold whipped cream into mascarpone mixture until completely incorporated. Use immediately.

8. To finish, Dollop frosting onto cupcakes; refrigerate up to overnight in airtight containers. Dust generously with cocoa powder just before serving.

Sunday, July 3, 2011

vanilla cupcakes with strawberry buttercream

First, I've gotta say that this morning/afternoon has been lovely.  There was jazz playing in the background, I had a pot of pasta sauce simmering away on the stove and I even had one of my Lemon Poppy Seed muffins for breakfast.  So peaceful =).

Now for the cupcakes.  Let me just say that they're amazing.  A co-worker of mine is going on maternity leave in the middle of July and I wanted to bake something for our last team meeting before she leaves.  I found this recipe from honey & jam and thought it would be a good fit for a baby shower/work meeting.  And I'm in love.

I picked this recipe mainly because it didn't involve pureeing strawberries for the buttercream (i'm food processor-less) and because the cake batter used almond extract.  The almond flavor is very subtle which is good because it might be too reminiscent of the death cake if it the cake was any sweeter.  Today's baking was a test run for the actual shower/meeting and I think it'll be a good fit.  The original recipe is below, but I used one third of the cake batter and halved the buttercream recipe.  Enjoy!


Vanilla Cake Batter

2 cups sugar
1 cup butter, softened
3 large eggs
1 tsp vanilla extract
1/4 tsp almond extract
3 cups cake flour
1 1/2 tsp baking powder
1/4 tsp salt
1 cup buttermilk

Preheat oven to 350.

1) Beat sugar and butter at medium speed with a heavy-duty electric stand mixer until creamy and fluffy, about 5 minutes.
2) Add eggs, 1 at a time, beating until yellow disappears after each addition. Beat in vanilla and almond extracts.
3) In a separate bowl, whisk together flour, baking powder and salt; add to sugar mixture alternately with buttermilk, beginning and ending with flour mixture. Beat at medium-low speed just until blended after each addition.

For two 9 inch pans, cook for 32-36 minutes.

My cupcakes baked for 24 minutes.


Strawberry Vanilla Buttercream

1/2 cup butter, softened
1 tsp vanilla extract
1/8 tsp salt
1 (16 oz) package powdered sugar
1/2 cup of fresh strawberries, chopped

1) Beat first 3 ingredients at medium speed with an electric mixer until creamy.
2) Gradually add powdered sugar alternately with strawberries, beating at low speed until blended and smooth after each addtion.

The buttercream is quite wet because of the strawberries, so I'm experimenting to see if keeping it refrigerated until serving stops the cupcakes from getting soggy.  A soggy cupcake would just be wrong.


Saturday, July 2, 2011

a couple failures and some tasty muffins

It's been so long! It's not that I haven't been baking, it's just that I haven't taken the time to document it. *sadface*  The last adventure was an underwhelming one. I made flavorless chocolate chocolate chunk muffins with my sister last weekend.  Not enough chocolate chunks. Not enough sugar.  I even tweeted my disappointment.

"and i'm mad at these chocolate-chocolate chunk muffins i made earlier. they look and smell amazing but taste like nothing! *sigh*"
19 Jun via web

 And to top it all off, a friend of mine amplifies all of my baking failures. Writing this makes it seem pretty mean, but I promise, he's a really nice guy!!  This bake-hate started at a shindig he hosted at his place back in March.  I told him I'd bring my famous Oatmeal Chocolate Chip Cookies, and he made mention of some Chocolate Chip Cookies that he's pretty well known for.  So, as the competitive person I am, it had to be a challenge.  The party attendees would crown the champion and there would be no question as to who the better baker was. 

So, that afternoon, I whipped out my ingredients, and baked up a batch of cookies.  I followed the recipe like I always do, but somehow, the cookies just tasted wrong!  I didn't know if my taste buds were off, or if they were really as horrible as I thought they were, but for some reason, I still put them in the car and took them to the party.  I hid my cookie tray in a dark corner on his counter top hoping no one would find them, but of course, Steve the bake-hater found them.  Now, as for the competition, his entry was non-existent.  He served us cookies his mother had baked. So I felt better knowing that the competition was a draw and I didn't actually lose.  But the bake-hater will never forget those horrible cookies.  And he jumped all over the news of the failed chocolate chocolate chunk muffins. I have to redeem myself.  It's a matter of pride.  Yes, I've had a few failures.  But in the grand scheme of things, I'm pretty good at what I do!  Most people know this, but Steve the bake-hater needs to be proven wrong.  

On a happier note, I made some Lemon Poppy Seed Muffins yesterday afternoon and they turned out lovely.  Another take on a Brown Eyed Baker's take on a Dorie Greenspan classic.  I'll be eating another for breakfast in the morning.  Next time, I might bump up the lemon flavor with some lemon extract, but the subtle lemon flavor is nice too.  The recipe calls for a bake time of 20 minutes but I let mine go for 22 minutes. They weren't as brown as they should have been when the 20 minute timer went off so I let them sit a while longer.


Lemon Poppy Seed Muffins

Yield: 12 muffins
Prep Time: 20 minutes | Bake Time: 18 to 20 minutes
2/3 cup sugar
Grated zest and juice of 1 lemon
2 cups all-purpose flour
2 teaspoons baking powder
¼ teaspoon baking soda
¼ teaspoon salt
¾ cup sour cream
2 eggs
1 teaspoon pure vanilla extract
½ cup unsalted butter, melted and cooled
2 tablespoons poppy seeds

1. Center a rack in the oven and preheat the oven to 400 degrees F. Butter or spray the 12 molds in a regular-size muffin pan or fit the molds with paper muffin cups.

2. In a large bowl, rub the sugar and lemon zest together with your fingertips until the sugar is moist and the fragrance of lemon strong. Whisk in the flour, baking powder, baking soda and salt. In a large glass measuring cup or another bowl, whisk the sour cream, eggs, vanilla, lemon juice and melted butter together until well blended. Pour the liquid ingredients over the dry ingredients and, with the whisk or a rubber spatula, gently but quickly stir to blend. Don’t worry about being thorough – a few lumps are better than over mixing the batter. Stir in the poppy seeds. Divide the batter evenly among the muffins cups.

3. Bake for 18 to 20 minutes, or until the tops are golden and a thin knife inserted into the center of the muffins comes out clean. Transfer the pan to a rack and cool for 5 minutes before carefully removing each muffin from its mold. Store leftovers in an airtight container at room temperature.

Wednesday, June 8, 2011

So, it's 11:00pm on a Wednesday night, I'm getting on a plane tomorrow, haven't packed, haven't washed my hair, and I'm baking cookies. Chewy chocolate almond cookies.  I just put the dough in the fridge to chill for an hour and it smells ahhhh-mazing!  Mmmmm... I love almonds. And chocolate.  So I'm very excited for the chilling to end and the baking to start.

Updates will come later!

2:05am

Oh yea.... these cookies are super tasty. It could be sleep deprivation, but I'm so incredibly content right now. Crispy, almond-y, crunchy, chewy and amazing.  I tweaked the recipe a bit and added 2 teaspoons of almond extract to bump up the almond flavor.  Recipe is below!

Ingredients
1/2 pound (2 sticks) unsalted butter; room temperature
3/4 cup light brown sugar, packed
1 cup granulated sugar
2 teaspoons pure vanilla extract
2 large eggs at room temperature
2/3 cup unsweetened cocoa (I used Scharffen Berger)
2 cups flour
1 teaspoon baking soda
1 teaspoon kosher salt
2 cups semi-sweet chocolate chips
1/2 cup blanched slivered almonds; coarsely chopped
Directions
1. In the bowl of an electric mixer fitted with the paddle attachment, cream the butter and both sugars until light and fluffy.
2. Add the vanilla, then the eggs, one at a time, and mix well. Scrape down the sides of the bowl after the addition of each egg.
3. Sift together the cocoa, flour, baking soda, and salt. Turn your mixer to low and gradually add the sifted ingredients; mix until just combined.
4. Fold in the chocolate chips and almonds. Refrigerate dough for 1 hour.
5. Preheat the oven to 350 degrees F. Line a baking sheet with parchment or a silicone baking mat.
6. Measure the dough using a 1 ½ tablespoon scoop or a rounded tablespoon. Roll the dough in your hands until it forms a uniform ball and place on your lined baking sheet.
7. Bake cookies for 11-12 minutes (the cookies will seem underdone). Remove from the oven and let cool slightly (about 3 minutes) on the pan, then transfer to a wire rack to cool completely.

Sunday, June 5, 2011

cookies: two kinds

I'm very particular when it comes to my cookies... at least I am when I'm the one making them.  They need to be chewy and crisp all at the same time. Not crunchy, not cake-like, and not texture-less.  To achieve this, my cookies need brown sugar instead of the plain ol' white stuff, and as much as I hate the thought of it, LOTS of butter.  Butter and brown sugar make the perfect base for a chewy crispy cookie. 

My all time favorite cookie to bake is this Oatmeal Chocolate Chip cookie that I found about a year ago.  It's perfect and has only failed me once (still not sure what went wrong with that batch....).  I use dark chocolate chips instead of milk chocolate and they have this caramel-ly flavor from the brown sugar that just makes me extra happy on the inside.

The second cookie is a Peanut Butter Chocolate Chip cookie that I made for a little hangout with some people from work.  We sat out by the Washington Monument, had a picnic, and played Phase 10.  I looked through a few recipes to make for the shindig before settling on this one.  I must've been on some "let me try to be at least kinda healthy with whatever I bake" tip because my main reason for picking this cookie was that it only had one stick of butter in it.  And that one stick of butter was not nearly enough to make the type of cookie I can fall in love with.  Don't get me wrong, the cookies were good, just not my favorite.  They were crumbly and had a pretty good flavor, but were best straight from the oven.  And even though they didn't pass the "Ave's Fave" test, they were oddly addictive. I guess combining butter and sugar will do that to a girl.

Somehow, I've managed to NOT take pictures of either of these cookies.  But here's the setting of picnic.  You can close your eyes and imagine the amazing-ness of the cookies and make pretty pictures in your mind. =)  


Oatmeal Chocolate Chip Cookies

1 cup butter
1 1/2 cups brown sugar
1 egg
1 tspn vanilla
2 cups oats (not the quick oats, the regular ones)
1 1/2 cups flour
1 tspn baking soda
1/4 tspn salt
1 cup dark chocolate chips

1) Cream butter and sugar until light
2) Add egg and vanilla and beat until fluffy
3) Combine oats, flour, baking soda and salt in a separate bowl.  Add slowly to sugar mixture until well combined.
4) Add chocolate chips.

Bake at 350 for 9 minutes and let cool.


Peanut Butter Chocolate Chip Cookies
from mybakingaddiction.com

1/2 cup butter
1/2 cup white sugar
1/3 cup packed brown sugar
3/4 cup peanut butter
1/2 teaspoon vanilla extract
1 egg
1 cup all-purpose flour
1 teaspoon baking soda
1/4 teaspoon salt
1/2 cup rolled oats
1 cup semisweet chocolate chips


1. Preheat oven to 350 degrees F (175 degrees C).
2. In a medium bowl, cream together the butter, white sugar and brown sugar until smooth. Stir in the peanut butter, vanilla and egg until well blended. Combine the flour, baking soda and salt; stir into the batter just until moistened. Mix in the oats and chocolate chips until evenly distributed. Drop by tablespoonfuls on to lightly greased cookie sheets.
3. Bake for 10 to 12 minutes in the preheated oven, until the edges start to brown. Cool on cookie sheets for about 5 minutes before transferring to wire racks to cool completely.

Tuesday, May 31, 2011

death cake

Yes, you read that correctly. I call this the death cake. It was my take on The Brown Eyed Baker's take on Dorie Greenspan's "Perfect Party Cake".  A lovely white cake infused with lemon. Filled with raspberry jam and raspberry swirled cream cheese frosting.  Topped with more frosting and fresh raspberries.  It had so much potential, and all of the pieces were delicious by themselves, but when combined, this cake would've killed a diabetic. Waayyy to sweet to be enjoyable. Beautiful on the inside and out, but I'm definitely going to have to tweak the recipe before I try to serve it to anyone again.  The worst thing about this cake is that I made it for a friend's 23rd birthday.  Thankfully, he's not a diabetic, but I still felt bad that I served him an unhappy birthday cake.  Well, there's always next year.  Here's the link to Brown Eyed Baker's original post: http://www.browneyedbaker.com/2008/03/29/daring-bakers-perfect-party-cake/


My biggest issue with the cake was definitely the frosting.  I've never made a cream cheese frosting before, but this one hardened up and was very gritty. The flavor was amazing, but it was too much for a whole cake.  Also, you may want to try using a sugar-free raspberry jam for the filling.  Cut out sugar wherever you can! 
P.S. you probably won't hear me say that very often.


Raspberry swirled cream cheese frosting for the filling
I never took a picture of the inside of the cake. 
Far too traumatized by the sugar rush to think clearly. 
This is the Brown Eyed Baker's version,
but mine actually looked similar!


For the Cake
2 1/4 cups cake flour
1 tablespoon baking powder
½ teaspoon salt
1 ¼ cups whole milk
4 large egg whites
1 ½ cups sugar
2 teaspoons grated lemon zest
1 stick (8 tablespoons or 4 ounces) unsalted butter, at room temperature
½ teaspoon pure lemon extract

For Finishing
2/3 cup seedless raspberry preserves stirred vigorously or warmed gently until spreadable [I used raspberry jam]
About 1 ½ cups sweetened shredded coconut [I omitted this]

Getting Ready
Centre a rack in the oven and preheat the oven to 350 degrees F. Butter two 9 x 2 inch round cake pans and line the bottom of each pan with a round of buttered parchment or wax paper. Put the pans on a baking sheet.


To Make the Cake
Sift together the flour, baking powder and salt.
Whisk together the milk and egg whites in a medium bowl.
Put the sugar and lemon zest in a mixer bowl or another large bowl and rub them together with your fingers until the sugar is moist and fragrant.
Add the butter and working with the paddle or whisk attachment, or with a hand mixer, beat at medium speed for a full 3 minutes, until the butter and sugar are very light.
Beat in the extract, then add one third of the flour mixture, still beating on medium speed.
Beat in half of the milk-egg mixture, then beat in half of the remaining dry ingredients until incorporated.
Add the rest of the milk and eggs beating until the batter is homogeneous, then add the last of the dry ingredients.
Finally, give the batter a good 2- minute beating to ensure that it is thoroughly mixed and well aerated.
Divide the batter between the two pans and smooth the tops with a rubber spatula.
Bake for 30-35 minutes, or until the cakes are well risen and springy to the touch – a thin knife inserted into the centers should come out clean
Transfer the cakes to cooling racks and cool for about 5 minutes, then run a knife around the sides of the cakes, unfold them and peel off the paper liners.
Invert and cool to room temperature, right side up (the cooled cake layers can be wrapped airtight and stored at room temperature overnight or frozen for up to two months).

To Assemble the Cake
Using a sharp serrated knife and a gentle sawing motion, slice each layer horizontally in half.
Put one layer cut side up on a cardboard cake round or a cake plate protected by strips of wax or parchment paper.
Spread it with one third of the preserves.
Cover the jam evenly with about one quarter of the frosting.
Top with another layer, spread with preserves and frosting and then do the same with a third layer (you’ll have used all the jam and have frosting leftover).
Place the last layer cut side down on top of the cake and use the remaining frosting to frost the sides and top.


Lemon Cream Cheese Frosting
(Adapted from quirky cupcake)
12 ounces cream cheese, softened
1 cup butter
2 teaspoons lemon juice
2 teaspoons vanilla
8 cups powdered sugar

In a medium mixing bowl combine cream cheese, butter and orange juice. Beat on low to medium until light and fluffy. Gradually add 4 cups powdered sugar, beating well. Gradually beat in the remaining powdered sugar until frosting reaches spreading consistency.

For the filling, add 2oz of fresh raspberries to about half of the frosting. Mix on low until the raspberries are broken up and you have a nice swirl.

Sunday, May 29, 2011

how it all started

The baking craze started in summer 2010 with this pineapple upside down cake. My dad was never a big baker, but when he did bake, he made pineapple upside down cake and I was craving it like crazy. So, i found this recipe and it's been a good staple for me. Even made it for my big sister's 24th birthday. And like the fatty she is, she ate it all. By herself. In one day. Shameful, if you ask me. But i can't blame her. The cake is good.


This was my first time making the cake and there was far too much caramel sauce for the size of the cake. Now I scale it down quite a bit. And it turns out great as cupcakes too!

Also, I apologize for the quality of most of the pics you'll see lol. Most of them are quick shots from my phone, but you get the point.

Pineapple Upside Down Cake
Topping:
1 cup firmly packed brown sugar
1/2 cup unsalted butter
1 can (20 oz) pineapple slices

Cake:
1 1/2 cups AP flour
6 tbsp cake flour
6 tbsp ground almonds
3/4 tsp baking powder
1/2 tsp salt
1 3/4 cups sugar
1 cup butter
4 large eggs
3/4 tsp vanilla
3/4 cup sour cream

Preheat oven to 325° F

  1. Combine brown sugar and butter and melt over medium heat until sugar dissolves and mixture is bubbly (about 10 mins). Don't stir after sugar melts. Pour into cake pan and arrange pineapple slices on top.
  2. Combine flours, almonds, baking powder and salt in a bowl. Set aside.
  3. Beat butter and sugar until light and fluffy. Add eggs 1 at a time. Add vanilla.
  4. Alternate adding dry ingredients and sour cream to the butter/sugar mixture until thoroughly incorporated.
  5. Pour batter on top of caramel and pineapples. Bake at 325° F for 1 hour or until toothpick inserted in the middle of the cake comes out clean.
 Note: if you're going to make them as cupcakes, bake for 20 minutes and then check for doneness.

welcome!

welcome to ave bakes!  i'm ave, and i love to bake! it makes me happy. and hopefully the things i bake make other people happy too.  this blog is my way of keeping track of the things i've made. some amazingly delicious, others... not so much. but i'm learning more and trying new things and from now on they'll all show up here.